
discoveries
discoveries
on the blog
Summer brings to mind images of lying on the beach soaking up the sunshine (with sunscreen on, of course!), wearing breezy clothing, applying light coverage foundation, and letting your radiant summer complexion glow. Right?
This is unfortunately not the reality for everyone. The fact is: summer weather causes us to sweat. Sweat can then clog pores and cause breakouts.
To help with these seasonal flare-ups, we have provided our top 5 tips to help keep your blemishes at bay.
1. Keep it clean
During the party season, our skin is exposed to more humidity, air conditioning, makeup, and sunscreen. It is important to rinse away excess oil and pore-clogging impurities with a gentle cleanser in the morning, before bedtime, and after heavy exercise. Adding our Clear Oil Control Foam Cleanser can help combat this problem.
Brimming with natural actives, the oil-free formulation uses Hemp Seed to help balance oil production and reduce shine. Witch Hazel and Willow Bark help remove impurities, naturally exfoliate skin and prevent future breakouts. 90% of people saw noticeably reduces redness and minimizes pores*.

2. Nourish your body
Eating a balanced diet loaded with antioxidants from fruits and vegetables can help keep the skin supple and nourished. It is also important to drink enough water throughout the day, especially in summer when our bodies are losing more water than normal. Drinking the recommended 3L per day will help aid in the digestion and absorption of food, keeping our skin smooth and soft.

3. Resist the urge to pop
Popping pimples can push infected material further into the skin, leading to more swelling and redness, and even scarring. But resisting the urge to pop pimples is easier with pimple patches or a spot treatment. Our Quick Fix Spot Treatment can be applied directly onto spots and blemishes. Formulated with botanical actives including Licorice Root, Witch Hazel and Salicylic Acid, the treatment rapidly helps to balance oil production and dissolve surface impurities to gently neutralise breakouts. 95% of people saw a noticeable reduction in redness*.

4. Moisturiser
Daily moisturising is a fundamental part of your skincare routine for maintaining and protecting skin moisture levels. It is also helpful for acne-prone skin, since once the skin becomes dehydrated, the body produces more oil, further clogging pores.
Summer is a good time to move away from your thick winter moisturisers to something more lightweight. Our Clear Urban Defense Moisturiser is a multitasking must-have. Helping to defend skin against sun damage, dehydration and excess shine, this oil-free daily moisturiser with SPF 15 is perfect for the summer season. Formulated with Willow Bark to clear pores, Hemp Seed to balance oil and Aloe to cool and hydrate, skin is nourished and shine-free.

5. Mask your way to calmer skin
Mask your way to smoother, calmer and more balanced skin. Our Clear Deep Detox Charcoal Mask is deeply detoxifying, the Kaolin Clay-based formulation with Charcoal effectively draws away congestion and excess oil. Hemp Seed helps to balance oil production and Aloe calms redness. Skin is left feeling clearer, smoother and hydrated.
To get you started on your skin journey, you can try the Natio Clear starter pack range. Natio Clear is for oily and problem skin, formulated specifically to help manage shine and targets breakouts or acne when they occur. This range of Australian-made, vegan-friendly skin solutions includes ingredients known to naturally assist with the effects of acne in teens and adults, for healthy clear skin that glows with health.


Clear breakout control starter set$29.95The Clear Breakout Control Set works on spots and redness with three complexion-clearing must-haves to cleanse, tone and target breakouts. Formulated with the power of plant extracts to help calm, balance and soothe for skin that feels fresh and clear. |
Clear shine control starter set$29.95Keep skin looking clean and shine-free with the Clear Shine Control Set. Includes three oil-balancing must-haves to cleanse, hydrate and treat skin with the power of plant extracts for a clearer complexion. |
Read More
The 90’s, a true juxtaposition in music and fashion. Whatever your style, you could find it splashed across the glossy mags of Cosmopolitan, Dolly and Women’s Weekly.
TLC fans were rocking baggy jeans and tube tops, shimmering pastel eye shadows and frosted lips. Your foundation mostly likely did not match your skin tone, but it was a vibe.
The grunge fans smelt like teen spirit with a touch of Dewberry Perfume Oil. Teenage angst was at an all time high and brow hair was at an all time low. Brown lipstick, thin brows, an over powdered complexion and chocker chains adorned the necks of 90’s youth. Then there were lip lacquers, body glitter, bronzing beads, bath beads, glitter hairspray and Impulse Body Spray…ahhh the glory days!
So whilst we can put down the tweezers and forget about the Yellow Pages, the 90’s are officially back… with some slight improvements.
Monochromatic make up looks, barely there beauty, over lined lips, Smokey eyes with nude lips and brick coloured lips that perfectly match your earthy toned outfits, are all back with a vengeance. A classic red lip with a bare face never goes out of style. So lets take a look at some of Natio’s 90’s inspired make up looks and how we have taken the best parts of the 90’s and bought them into the 21st century. These are the trends of 2022…
The monochromatic make up look with a brick lip
Smokey eyes with nude lips

Natio naturally nude lip colour in Chai
A classic red lip with a bare face

Read More
Navigating your beauty purchases online can be overwhelming and confusing, especially if you’re not 100% sure what you’re looking for. One of the most frequently asked questions by customers is ‘is my skin dry or dehydrated’? These two often get confused as the same thing, however there are some integral differences that need to be determined before you should *add to cart.
So how can you easily identify if your skin is dry or dehydrated.

Let’s take a step back and talk skin types vs skin conditions. In short, skin types are for life, whereas skin conditions can change frequently and are in addition to skin types. Normal, dry, sensitive, oily & combination, are all skin types. Skin conditions cover concerns such as acne, dermatitis, dehydration, sensitized skin, eczema & rosacea, just to name a few.
Dry skin is a skin type, where the skin is lacking oils and lipids. A person with dry skin will have minimal visible pores, skin texture may appear thinner, finer with possible redness, flakiness and a rougher texture is not uncommon. A true dry skin will enjoy textures that are rich, emollient and oily. Products with these rich textures work on more of a surface level and are going to be ideal of a true dry skin, protecting it like a barrier.
Dehydrated skin is a skin condition where there is a lack of water in the skin. Dehydration can happen to all skin types, even oily acne prone skin – it’s actually very common in these skin types, due to the usage of products and active ingredients which help to eliminate acne. Some tell-tale visible signs of dehydration may be skin dullness, surface dehydration lines & skin itchiness. A dehydrated skin tends to enjoy water based, lightweight and fresher textures, that make your skin feel like they’ve had a big drink of water.
Outlined below are a few products which would be ideal for dry & dehydrated skins.
Dehydrated

Treatments - Hyaluronate Skin Hydration Serum
Deliver a daily boost of deep hydration to skin, with this skincare concentrate.
Hyaluronic Acid (Sodium Hyaluronate) holds 1000 times its weight in water, so it’s extremely hydrating, plumping and will make skin smooth and hydrated. Use under your moisturiser for all day hydration.
Rosewater Hydration - Moisture Boost Day Cream-Gel
Keeping skin hydrated during the day is key to a youthful glow, less breakouts and excess oil production. Calming ingredients such as Rosewater can help to reduce redness, balance skin Ph & reduce acne scarring.
Rosewater Hydration - Moisture Gel Sleeping Mask
Skin repairs at night and replenishing ingredients such antioxidant Rosewater, plumping Hyaluronate and calming Calendula Flower deliver deep hydration and a softer, more supple complexion, whilst you sleep.
Dry Skin
Treatments - Goji Berry & Vitamin E Antioxidant Facial Essence
Essences have been used for a long time in Asian skincare routines as an additional step to targeting intense hydration and a more radiant, plump complexion. Essences are traditionally used after your toner before your serum or moisturiser. The water like consistency, with the support of Hyaluronate, Goji Berries & Green Tea, provide hydration, strengthen the skins barrier function & reduce inflammation.
Aromatherapy - Intensive Moisturising Day Cream
Deliver essential daily hydration to your stressed and thirsty skin with this effective, concentrated plant-based cream. Botanical extracts and essential oils help to activate the skin's natural moisturising systems and promote a soft and supple radiance, leaving skin plump and nourished.
Aromatherapy - Intensive Moisturising Night Cream
Repair and replenish with this rich and deeply hydrating night cream. Nourishing plant oils and extracts promote supple skin and smooth fine lines and wrinkles for a more youthful, rested-looking complexion.
 Precious Oils – Regenerative Face Oil
A beautiful blend of pure botanical oils, including Jojoba, Rosehip and Hazelnut. This rich nourishing oil is high in vitamins and essential fatty acids to help increase skin's hydration levels and improve elasticity for a more supple, firmer-looking complexion.
Application tip: use alone, layer with a moisturiser or mix in a few drops into your moisturiser, on the back of your hand before applying to boost slip and efficacy, of your chosen moisturiser.
Read More
As we peel off the winter layers and start to enjoy the sunshine amongst newfound freedoms, for many Australian's just getting out of lockdowns, appointments at your favourite salon are few and far between. Taking beauty into your own hands (literally) will help you to feel and look fabulous for the festive season.
An area which is the fastest to show ageing and is usually most neglected, tends to be your neck and décolletage. This is an area that is highly exposed to the elements and visible sun damage is common. Below is your recipe for a smoother, brighter and younger looking décolletage.
Neck & Décolletage Rejuvenation

Step 1. Gently buff the delicate neck & dec area with the treatments Bamboo & Papaya Rejuvenating Micro-Exfoliant. Using circular motions, massage the exfoliant into the skin and rinse with lukewarm water.
Step 2. Onto Damp skin apply the Ageless Hydrating Mask onto the freshly exfoliated area. Light a candle, make a cup of tea and put your feet up for 10 minutes while the mask works its magic, then rinse with lukewarm water.
Step 3. Apply the treatments Replenishing Neck & Decolletage Cream in upward sweeping motions to encourage lifting of the skin. Now it's time to enjoy your post treatment glow.
Note – you should always apply SPF on the neck & dec area during the day. My favourite is the Rosewater Hydration Moisture Balance Day Cream SPF 50+. This same treatment can be used on hands, simply replace the neck & dec cream with our favourite Natio hand cream.
Is your skin is looking tired, dull and lacking radiance? The below at home treatment will gently repair and replenish your skin in 15 minutes. The perfect routine as a pre party skin prep.
Repair, Replenish & Glow

Step 1. After cleansing your face, whilst skin is still damp, apply the Aromatherapy Gentle Facial Scrub in circular motions. Massage for 30 seconds before rinsing with lukewarm water.
Step 2. Apply the treatments Marine Mineral Overnight Repair Sleep Mask – this mask can be used as an overnight mask, however it can also be applied as a 10 min treatment mask. Apply a generous layer of the mask, leave on for 10 minutes and remove with lukewarm water.
Step 3. Revive tired eyes by applying the treatments Plant Peptide Firm & Smooth Eye Cream with the rounded paddle applicator. This cooling paddle relives tension and puffiness, whilst the cream brightens and soothes the eye area.
Step 4. Deliver a boost of deep hydration with the treatments Hyaluronate Skin Hydration Serum. Massage a few drops of the serum into your face, neck and décolletage area.
Step 5. Follow with your chosen Natio moisturiser. A good all round, anti-ageing moisturiser is the treatments Skin Renewal Ceramide Line & Wrinkle Cream. Formulated with skin-firming Ceramides and Omega 3, 6 and 9 essential fatty acids, this luxurious cream offers gentle yet effective smoothing and replenishment for ageing skin.
For those with oilier or on occasion problematic skin, the below at home treatment will leave skin deeply cleansed, hydrated and balanced.
Deep Cleanse & Balance

Step 1. Gently sweep the treatments Radiant Skin Exfoliating Wipe over a cleansed face and neck, avoiding eye area. Wait 1 minute, then rinse away with water. The wipes contain Plant PHAs (Poly Hydroxy Acids) which gently dissolve away dead skin cells without abrasion, helping to smooth skin texture and reveal a healthy, radiant glow.
Step 2. Apply a thin layer of the Clear Deep Detox Charcoal Mask, avoiding the eye area. Leave to dry for 5-10 minutes, less if you have sensitive skin. Rinse thoroughly with warm water and wipe with a face cloth.
Step 3. Warm a few drops of the Clear Skin Balancing Face Oil in your hands and gently press into the skin. The replenishing blend of targeted plant oils and extracts will help bring calm and harmony to unbalanced skin. With Hemp Seed to help balance oil production, Tea Tree to minimise redness and Salicylic Acid to dissolve surface impurities. Your post treatment skin should look clearer, brighter and more radiant.
Read More
Mascara is a vital part of any simple makeup routine, and these days there are a myriad of mascara formulations to suit any preference. You can choose from waterproof formulas, mascaras that lift, curl, separate or lengthen. And the next-generation of mascaras are Tubing Mascaras. Tubing mascaras are ideal for achieving a natural makeup look, that’s easy to apply and lasts all day. They differ in their formula to traditional style mascaras, which need to be removed with cleansers, oil or makeup removers. Instead, tubing mascaras ‘wipe away’ with water – no smudging, flaking or mess!

How do tubing mascaras work?
Formulated with high tech polymers (to create the 'tubing' effect), these mascaras wrap lashes in no-mess, long-wearing tubes that set quickly, amplify lashes and stay in place all day. It makes them a comfortable and low-maintenance option that won’t smudge on application or budge from humidity, sweat or natural oils.

Who do tubing mascaras suit?
The short answer – anyone! They can be used on lashes of any length, are easy to apply and remove, and create a soft natural look. More specifically however, tubing mascaras are great for people who find traditional mascaras smudge or transfer due to sweat, watery eyes or oily eyelids. This also makes them great for humid environments (hello beach holidays!) or for wear during exercise. Natio’s Tubing Mascaras range includes two brush options in two shades. The formulas are cruelty free, vegan friendly and feature natural ingredients to care for lashes: Candelilla and Carnauba Waxes, as well as extracts of Elderberry, Blackcurrant, Peppermint and Cassia Bark.
How do I use tubing mascaras?
These types of mascaras are great for lengthening and thickening, rather than providing curl. So, it’s a good idea to start by curling your eyelashes first. Then choose between the two brushes and two colors available: Natio’s Precision Tubing Mascara features a slim line brush designed to locate and individually wrap each and every lash - no matter how short - in micro fine tubes of volume-building fibres for a natural look. Best for reaching the inner corners or short, straight lashes - without any mess. Available in Black and Brown/Black.

While the Infinite Tubing Mascara features a larger, domed brush which cleanly and generously builds length and volume for a more dramatic fringe effect.

Now it’s time to apply! For separated and defined lashes, zig-zag/wiggle the wand at the base of the lashes to build volume before pulling through the lengths. For added lift, apply to the underside of lashes, rather than the top.
Apply 2 coats while the mascara is wet - don't let it dry between coats.
How do I remove my tubing mascara?
The easy removal of tubing mascara is one of its main benefits. Tubing mascaras don't require any makeup remover; simply saturate a cotton pad with warm water and hold it against your lashes for 30 seconds, then gently wipe mascara off lashes. No mess, no smudging, no hassles!

Not sure which Tubing Mascara to try?
Generally speaking, if you have short or straighter lashes - go for the Precision Mascara. Its small brush will help you locate and wrap each and every lash for a naturally defined look. If you want general volume and lengthening, try the Infinite Mascara. And if you experience watery eyes, oily eyelids, or sensitivity to some traditional mascaras or makeup removers, you’ll love both brushes and the non-slip tubing style of this clever mascara formulation!
Read More
Smudge proof, sweat proof, life proof makeup? Enter the new generation of Tubing Mascaras from Natio. Say bye bye to panda eyes and hello to unforgettable lashes.
Formulated with a mix of both high tech polymers and natural botanicals including Candelilla and Carnauba Waxes, extracts of Elderberry, Blackcurrant and Cassia Bark, these new tubing mascaras offer the best of both science and nature.
Tip: Tubing mascara requires no makeup remover, simply saturate a cotton pad with warm water and hold it against your lashes for 30 seconds. Then gently wipe mascara off lashes.
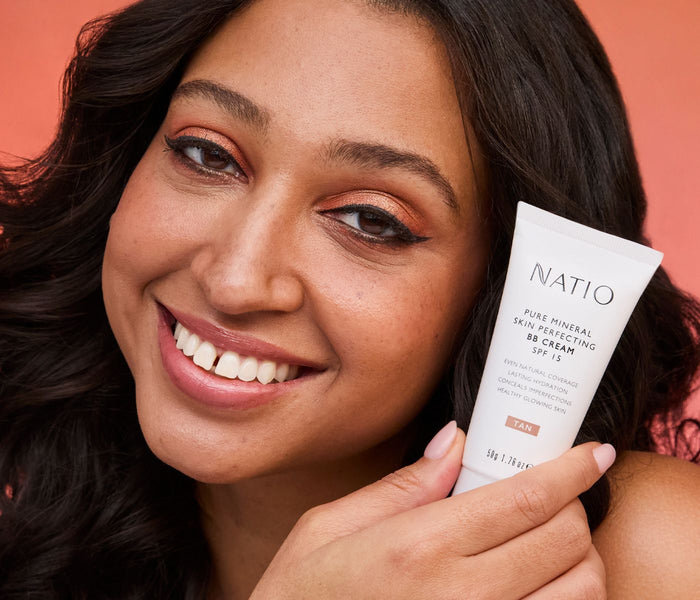
All hail the ‘do it all’ Pure Mineral Skin Perfecting BB Cream SPF 15.
This BB or Beauty Balm will not only hydrate your skin, help protect against UV rays but also unify the tone of your skin and help reduce the appearance of redness.
It is a universal mix of tinted moisturiser and luminous foundation to take you from morning to night.
Give your skin a sun-kissed glow with Natio’s cult classic Mineral Pressed Powder Bronzer in Sunswept. This Bronzer creates a healthy and natural-looking sun-kissed radiance in the convenience of a luxurious, easy-to-use, oversized palette, with a generous mirror and rubberised casing. Sweep it across the forehead, nose and high points of the cheeks for a sunkissed glow or all over the face, neck & decolletage for a warm, healthy radiance.
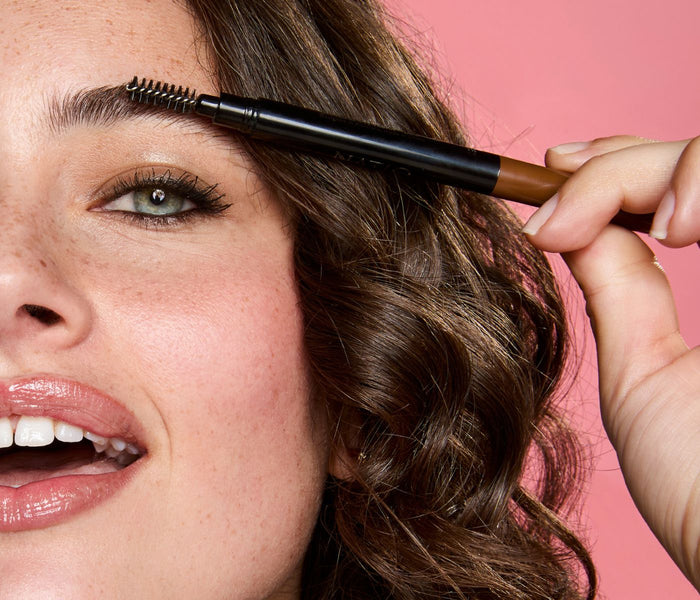
Naturally fuller, brushed up, fluffy brows continue to dominate the runway, but this ongoing trend will have you looking polished and primed…naturally.
Designed to hold your unruly brows in place all day with the swipe of a wand, this quick and easy to apply gel will give you hold and create fullness in seconds.
For those who don’t want added fullness, only hold - the Clear Brow Gel would be ideal. If you’re looking to add more definition, colour and fullness, then opt for the coloured version which comes in a Light or Dark Brown Gel.
SPF Always!
The best SPF is the one you’re happy to wear… for me this is the SPF 50+ Moisturiser...for Men. Am I a man, no…but for me, this SPF ticks all of the boxes…non-greasy, quick-dry formulation, delivers a clean-feeling, wears comfortably alone or under makeup, whilst giving me high UVA & UVB protection and the added bonus of being the best anti-ageing product a girl can ask for. Don’t forget to look after your lips too with a Moisturising Lip Balm SPF 50+ - it’s a summer essential.
Read More
Scented candles are an ideal way to achieve true holistic wellbeing. They have the ability to transform a space using scent only, and create an environment to help us feel secure, comfortable and relaxed. The scent you choose can be selected to suit your mood, from creating a warming cosy feel through to an uplifting ambience to bring energy into your sanctuary.
Did you know there are Dos and Don’ts when it comes to getting the best out of your Scented Candles?
Of course, some are obvious – there for safety reasons such as never leaving a candle unattended or burning them around children. But there are also some lesser-known scented candle tips that will help make your candles to smell better, last longer, and burn more evenly.

- READ THE FINE PRINT
Yes, candles normally carry a warning label, usually on the base of the candle itself or the box it came in. Get started by reading the label, which will outline all the important safety advice you should know about that particular product.
This info may vary from candle to candle, depending on its size, volume, wax, wick type and number of wicks, so it’s important to take a moment to read this with any new candle you purchase.
- BURNING TIME MATTERS
You should never light a candle for 10 minutes only. This causes a narrow pooling of wax around the wick. Natio Scented Candles are designed to be used for between 1-3 hours, especially on the first use. This ensures an even, clean burn for the rest of your candle’s life.
- WATCH THE WAX
As the candle burns, wax will naturally melt and pool around the wick. Did you know it’s important to keep an eye on the amount of liquid wax in your candle? If there is too much (more than around 12mm), it can cause your candle to crack.
TIP: If the wax does start to pool around the wick, simply extinguish the candle and allow the wax to become solid before using it again.
- WATCH THE WICKS
Candle wicks needs to be kept in top shape. All this takes is a little trim now and then.
Ideally you want to keep your wicks no longer than 7mm – any longer and they will burn too quickly and cause the sooting black smoke you may have seen on the inside of a candle jar.
Once the wick needs a trim, just snip it back with a pair of scissors or specialist wick trimmer.

- EXTINGUSH SAFELY
This may seem obvious – but you should never use the lid of a scented candle to extinguish it (by placing it back on top of the candle while still burning). Always blow a candle out, or use a candle snuffer to extinguish the flame.
- KNOW WHEN IT’S TIME TO SAY GOODBYE
How do you know when that time comes? A candle has come to the end of its life (for burning, at least) once the amount of solid wax gets down to 13mm. The jars can still be handy though. Empty the remaining wax by freezing the candle overnight, then simply tipping it upside down. The (now shrunken) remaining wax should tip right out. If it doesn’t, all it needs it a gentle push with a spoon on one side of the wax to remove the waxy disc.
Now continue using the empty vessel for storage or even as a vase for small flower arrangements and continue to fill your home with the beautiful, blissful scents of nature.
Other safety tips
- Do not leave candles burning unattended
- Do not use candles around children or pets
- Do not use under curtains, blinds, plants, near flammable items or in draughty areas
- Do not move while burning or while wax is still liquid
- Store candles in a cool, dry, preferably dark environment
- When not in use store with the lid secured
- Are Made in Australia
- Are refined with natural Essential Oils
- Use lead-free cotton wicks and a natural Soy-blend wax
- Have up to 50 hours burn time
- Are housed in a timeless matte white glass vessel
Read More
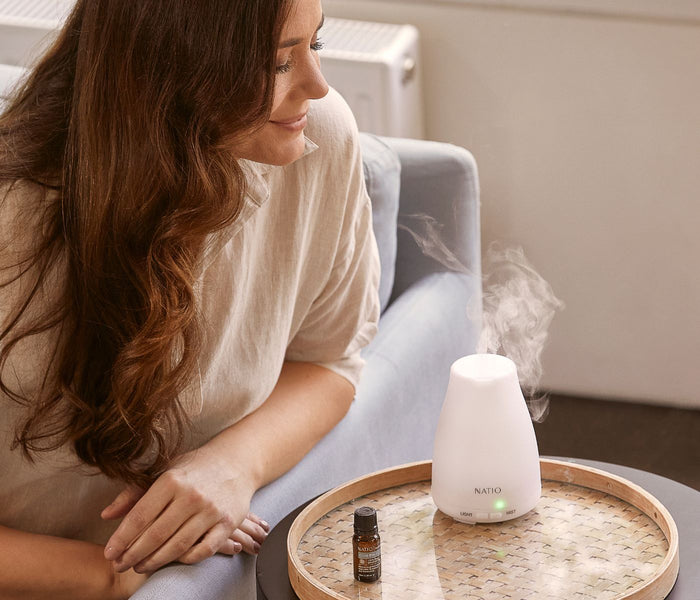
The beauty of essential oils lies in their simplicity and versatility. With Natio’s 100% pure and natural essential oils you can dream up any number of scent combinations to suit every mood, room and occasion to blend together, diffuse with ease and create a feeling of total wellbeing.
tips for creating the essential blend
Similarly to perfumes, essential oils are grouped into scent types - floral, woody, menthol, herbal and citrus, as well as scent notes - 'top', 'middle' and 'base', which when combined create a well-balanced fragrance that lift the mood and calm the mind. To capture the perfectly balanced essence of mother nature, try blending together floral and citrus scents, or menthol and woody oils to create a captivating, harmonious, unique fragrance.
- Floral Essential Oils - Geranium, Lavender
- Woody Essential Oils - Cedarwood
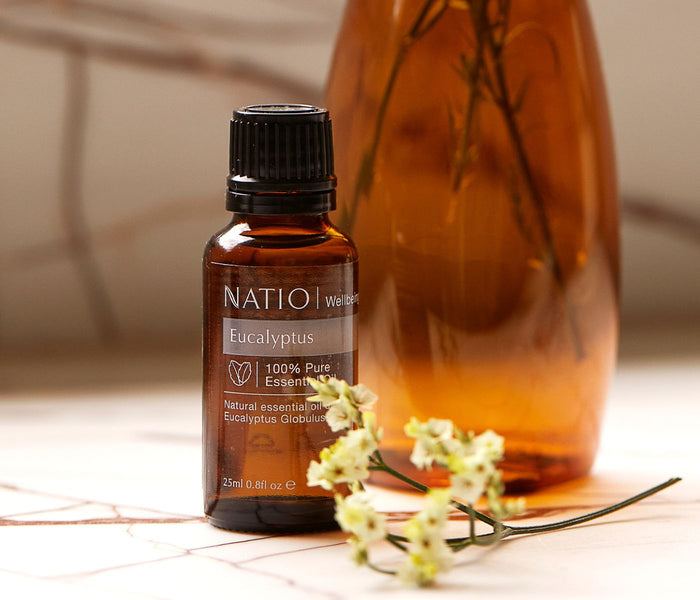
- Menthol Essential Oils - Eucalyptus, Peppermint
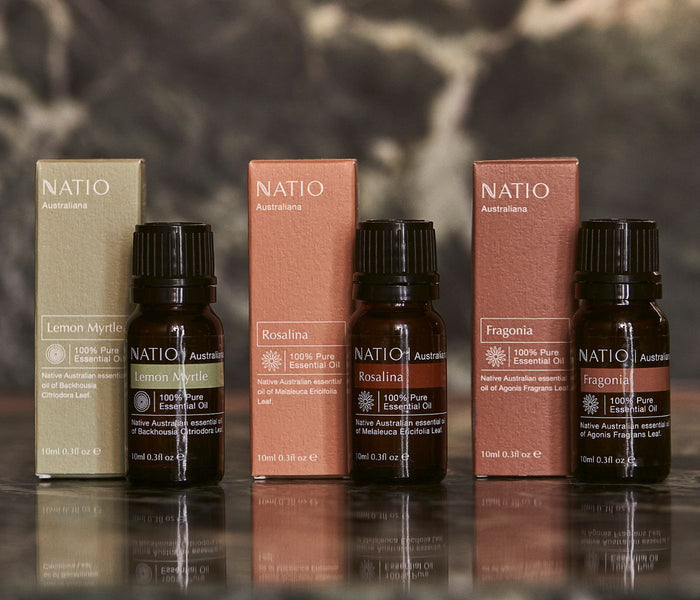
- Citrus Essential Oils - Lemon, Lemon Myrtle, Orange Sweet
- Herbal Essential Oils - Lemongrass
Ideally your essential oil blend contains a top, middle and base note, allowing for a balanced blend that is pleasing to the senses. The best way to think of a top note is something that is light and subtle that evaporates quickly. The middle note makes up the bulk of the fragrance, with the scent becoming apparent under the top note. Finally, the base note is the heaviest scent and the slowest to disperse; the scent you a left with the longest.
- Top notes - Eucalyptus, Lemon, Lemongrass, Lemon Myrtle, Orange Sweet, Peppermint
- Middle notes - Geranium, Lavender
- Base notes - Cedarwood
Creating your own unique essential oil combination is as simple as following the tips listed below:
- Regardless of application, start by mixing 10 drops of essential oils in total, in a clean bowl or bottle. Small amber glass bottles are ideal as they ensure oils are not exposed to direct sunlight or have the chance evaporate quickly.
- Follow the 30:50:20 ratio when mixing scent notes - 30% top note (3 drops), 50% middle note (5 drops) and 20% base note (2 drops), label each new blend clearly.
- Essential oil blends perform best after 'resting' for a day or so, this will allow the oils to blend and harmonise fully.
- If you plan on using your essential oil blend as part of a skin or body treatment, it must first be diluted (pure essential oils should not be used directly on the skin). Do this easily by adding 1 drop of your essential oil blend to 1 teaspoon of your favourite carrier oil. For sensitive skin, add 1 drop of your essential oils blend to 1 tablespoon of your favourite carrier oil. Some common carrier oils are Jojoba or Sweet Almond.
- Your unique essential oil blend can now be added to your diffuser, a relaxing bath, applied as a luxurious skin treatment or used for a soothing massage - the possibilities for enjoyment are endless.
To deep dive into our entire 100% pure, natural Essential Oil range click the link to learn more about the individual benefits and scent profiles: https://www.natio.com.au/collections/essential-oil
essential oils recipe guide & blending tips
Create your favourite scent blend by mixing Natio's essential oils to help de-stress, relieve pain, refresh the body and calm the mind. When mixing oils, woody scents and citrus fragrances always blend well together. Stronger scents such as Peppermint and Cedarwood can overpower a scent blend, however this is easily remedied with a hint of Lemon or Lavender. Just like anything new, with practice you will learn and gain confidence creating your own personal scent preferences.
Of course, essential oils don’t need to be blended together - they can always be enjoyed as a single, pure aromatic scent. And if you enjoy the complexity of blended oils but would like the guesswork taken out of process, consider Natio’s range of Essential Oil Blends. This curated range of oils features multiple 100% pure essential oils beautifully blended in each bottle, to create inspiring natural scents for you to enjoy.
Read More
Though nothing truly compares to a professional massage, you can certainly benefit from more regular DIY massage in the comfort of your home. In this guide, we share tips for treating yourself or your partner to a papering massage using Natio’s nourishing Massage Oils.
Before you even begin, remember that a good massage starts with a tranquil and cosy environment. Make sure the room is warm and comfortable to help your body relax. Create a serene atmosphere using low lighting, soft music or by diffusing essential oils to envelop the room in naturally calming scents.
Another tip before beginning your massage is to gently wipe the area of the body being massaged with a damp, warm hand towel. Make sure both the massage oil and your hands are warm; you can heat a little oil in your hands by rubbing them together before placing on the body. Use just enough oil to prevent friction, but not so much that hands become too slippery and hard to control.
Consider your breathing during a massage. Breathe deeply during the massage to help further calm the body and mind. And there are some times to avoid massage, including just after eating, if you are injured, dizzy, have a temperature, suffer chronic pain or if you are pregnant.
1. choose your application
1. Face Massage
 |
Facial massage is easy to do yourself and can be incorporated into your nightly routine using your favourite face oil or one of the carrier oils from Natio's Home Happiness range. Like any other type of massage, this rejuvenating ritual helps gently stimulate blood flow, relax and tone facial muscles, release tension and awaken the senses. As a bonus, working a nourishing oil into the skin also helps deeply moisturise the complexion and improve radiance. |
- After cleansing, smooth a Natio Carrier Oil of your choice over the face and neck with warm hands and work it into the skin. Always use a soft and gentle touch when massaging the delicate facial area, mixing circular strokes with soft sweeping movements and gentle acupressure, lightly pushing, pressing and tapping the skin without dragging or pulling.
- Using gentle but firm pressure, massage down the jaw and neck, moving out along the collarbones.
- With your forefinger and middle finger, gently apply pressure in front and behind your ears in long downwards strokes, continuing out along the jaw.
- For the lightest pressure, use your ring finger to lightly trace circles or softly tap along your eyebrows and under your eyes.
- Massage down either side of your nose and sweep out over your cheekbones.
- Finish by massaging your forehead, moving out over your temples to release tension.
- You can massage your face daily or weekly, for as short or as long as you have time for.
2. Hand Massage
 |
From eating, dressing and typing to doing the dishes, hands rarely rest, making them one of our most hard-working body parts. Hand reflexology is a great way to relieve tension after a hard day's work and something you can easily do yourself while relaxing on the couch or even in a warm bath. |
- Start by shaking your hands and wiggling your fingers.
- Stretch hands by extending your fingers as wide as possible and releasing.
- Bend your wrists, flexing hands up and down.
- Press each finger into the palm of the opposite hand, gently bending your fingers back.
- Apply a few drops of the Natio Massage Oil of your choice to your palm and slowly massage out along each finger.
- Pinch the tips of each finger, holding for a few moments with your index finger and thumb.
- Squeeze the sides of each finger, holding for a few moments with your index finger and thumb.
- Using the opposite thumb, knuckles or heel of the hand, knead the palm of the hand. Pay extra attention to the pressure point between your index finger and thumb, massaging and applying gentle pressure to the area with your thumb and index finger.
- Applying light pressure, glide your fingers in gentle, flowing, upward motions from the wrist along the arm up to the elbow. Repeat the motion along the back of the hand upwards towards the elbow.
- Repeat the steps on the opposite hand.
3. Foot Massage
 |
Your feet do a lot of work every day - whether you are chasing after children, wearing your favourite heels or your job keeps you on your feet all day. A foot massage is not only delightfully relaxing, it can also help soothe soreness, improve blood circulation and increase your energy levels. |
- Prepare a luxurious foot bath by adding 3-6 drops of your favourite essential oil to small amount of carrier oil and stirring through a large bowl of warm water.
- Soak feet in a warm foot bath for 10-15 minutes to soften skin and relax the body. Alternatively, rinse feet with warm soapy water, then pat dry.
- Place feet on pillow or towel roll for comfort
- Warm the Relaxation Massage Oil or Sports & Muscle Recovery Massage Oil between your hands and begin with long soothing strokes over the top of the foot, working from the ankle to the toes.
- Using the heel of your palm apply gently pressure in slow motions up the sole of the foot.
- Using your thumbs, circle over the heel of the foot, massing up the arch to the toes.
- Cupping the heel of the foot in one hand, gently flex the foot up and down to loosen any stiffness in the ankle joints. Then gently massage around the ankle bone in circular motions.
- Spend some time massaging each toe. With your thumb on top and your index finger underneath the toe, slide your thumb and finger over each toe, in a gentle pulling motion.
- Repeat the steps on the opposite foot.
4. Relaxation Massage

|
A common place to hold tension and stress is through the neck, shoulders and back from working long hours hunched over computers or looking at phones. A relaxation massage is ideal to help a loved one relax, relieve muscle tension and help induce sleep. |
- Ask the recipient to lie down and take a few deep breaths while you warm the Massage Oil between your palms.
- Using long, sweeping strokes massage from the glutes to the upper back with the palm of your hand or fingertips.
- Keeping hands on either side of the spine, move out over the shoulders in sweeping, circular motions.
- In areas where you feel tension, apply some pressure and slowly release, easing out over the tightened area to gently relax the muscle.
- Massage down the arms and hands in soothing, sweeping motions, focusing on one arm and hand at a time.
- Using long, flowing strokes move over the back of the legs, working from the calf up to the thigh and back down again wrapping your hands over the feet and massaging the soles with your thumbs.
- Ask your recipient to turn over and lie on their back, placing a pillow underneath their head for support. Gently knead their shoulders, moving your thumbs in small circular motions either side of the spine, up the neck to the hair line.
- Finish with a relaxing head massage, spreading fingers out over the scalp in soft circular movements.
5. Sport Massage
 |
Sports massage tends to be more targeted than relaxation massage, focusing on specific muscle groups of the body. Often excessive or repetitive exercise can result in tired and aching muscles, especially through the legs. A sports massage is ideal to help relieve muscle tension and induce sleep. |
- Follow all the steps given above, but target specific areas that may be sore from physical activity. Spend longer massaging these muscles to help relieve tension or soreness. A Sports & Muscle Recovery massage can target specific areas of the body sore from physical activity.
2. choose your massage oil
Now that you know the basics of massage you’re almost ready to get started. All that’s left is to select which Natio Massage Oil to use.
Both are silky and non-sticky in a deeply moisturising Sesame Oil base, rich in Vitamin E to nourish the skin as you massage. Blended with essential oils to enhance the senses, ease away stress and tension.
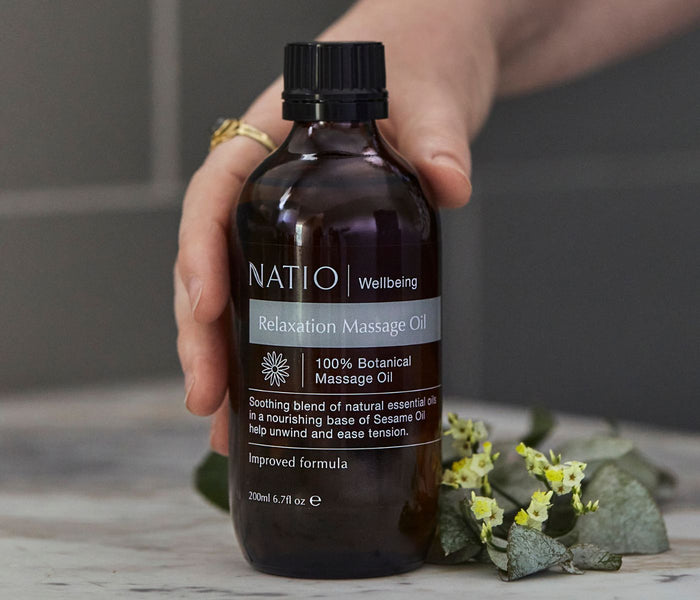
- Relaxation Massage Oil – For all skin types. With Lavender and Rose Oil. Often used to calm and soothe.
- Sports & Muscle Recovery Oil – For all skin types. With Rosemary, Cinnamon and Wintergreen Oil – a slightly more peppery, botanical scent.
Massage information provided with assistance from massage experts, Marigold Relaxation
Read More
Natural colours to enhance your natural beauty
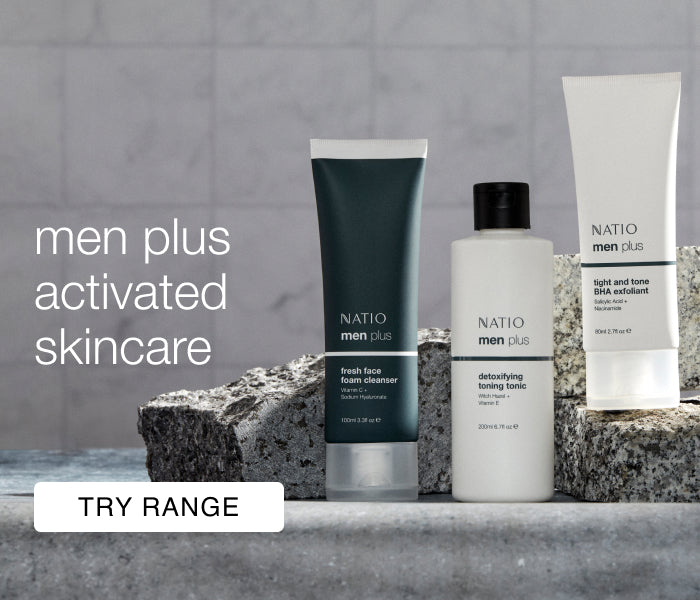
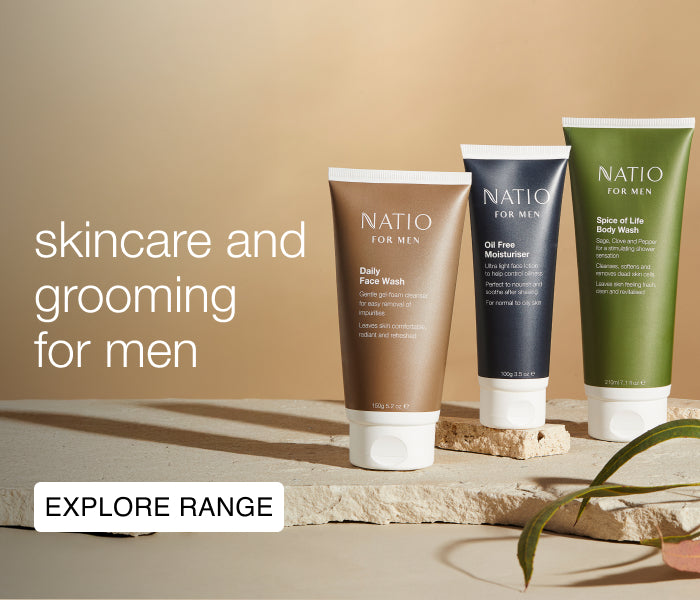
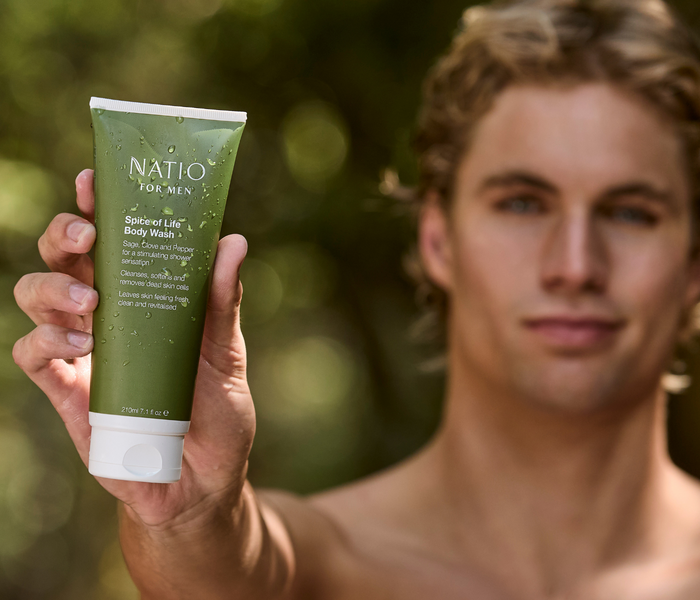
Advanced and activated skincare made for men


